Arnold Howard
Ask Arnold
Buy Kiln
Foam sheet
Glass
Glass Art
Glass Design
Glass Design Ideas
Glass Fusing
Glass Fusing Kiln
Glass Kiln
Glass Kilns
Kiln Safety
kiln-education
Moving your studio kiln
Paragon Fusion 10
Paragon Kiln Fusion 10
Paragon Kilns
Top Load Glass Kiln
Top Load Kiln
Moving Your Studio Kiln... and other crazy annoying things!
It's a fact of life that humans are nomadic. We try to settle down in one place, but as comfortable as we get, we eventually pick up all of our stuff and move it to another location. As an artist I am certainly not immune to this condition. Over the last 15 years I will have moved my studio 4 times. First my home, then my first real studio out of my house - 8 years, then the next one - 3 years, now this one - 2 years. The reasons always seem legitimate; bigger space, which eventually raised rents too high, then less expensive space, which eventually proved to be too far to travel (45 minutes each way) The current space is close to home (8 minutes!) but alas, crowded. Nothing is every perfect it seems.... so we move to create a more perfect situation. This brings me to the point of this blog; moving the most important thing in everyone's studio.... the kiln.
 Just thinking about how to move a kiln brings a lump to the throat. It makes even the most relaxed person a little nervous. You might think that small kilns would be a "no-brainer" to move, but they can be damaged too. Often, it's the items we don't go out of our way to protect that become the most damaged.
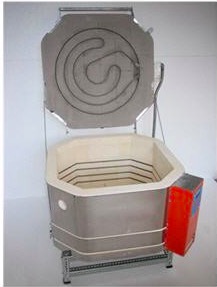
Arnold Howard, Engineer Extraordinaire from Paragon posted a blog a few years ago that covered this really well. He states,"The main concern in moving a kiln is brick damage, especially to the lid. The wiring is usually not affected by a move." Those of us with Fiber kilns also need to take great care to not dent the or damage fiber exterior!
 Here's what to do: ..."Sandwich a 1/16" thick sheet of foam packing between the kiln body and the lid." (This is the stuff that comes in rolls at the office supply store, or at home depot.) "The foam sheet must extend under the lid completely so that no section of the lid touches the kiln walls. This is very important. I have seen kilns sent to the factory without the protective sheet under the lid. The kilns were always damaged. If you are moving a front-loading kiln, place the foam sheet between the door and firing chamber." Strap the tip or door down and wrap the entire small kiln in a blanket. Then place the kiln in your trunk surrounded by blankets and towels with no other hard objects in the area. Then proceed to your destination.
If you are moving a larger kiln, follow the same instructions for the smaller kiln, and then,...."Lay a 1" thick piece of Styrofoam board over a wooden pallet. Then place the kiln on the Styrofoam. (The Styrofoam and pallet must be large enough for the entire kiln.) On top of the kiln lid, place one or two sheets of 1" thick Styrofoam, and on top of that, a light-weight pallet. Then band the two pallets tightly. If you are moving the kiln a long distance, you could nail vertical 1x4 boards at the corners to form a crate. Then add diagonal boards on the sides for stability." I love this video, also from Paragon which shows how to crate a kiln!
 He also states, "Do not place anything inside the kiln during a move, especially shelves and posts. Unless your kiln is securely crated, do not place anything on top of it. Place the kiln near the front of a truck or trailer where the ride is smoother."
For those of you who are moving your studio... best of luck! It will all be over soon!
Your Kiln Gal, Gail


Leave a comment